Qlik servers
Connects KPImailer to your Qlik Sense deployment - one on-premise Qlik Sense Enterprise server and one Qlik Cloud tenant - and controls how hard each connection is worked.
Setting up Qlik Cloud access
Section titled “Setting up Qlik Cloud access”Before you can connect a Qlik Cloud tenant, either here or in the first-run wizard, an administrator of that tenant needs to create an OAuth2 machine-to-machine (M2M) client and a Web integration in the tenant’s own Management Console. This happens entirely on the Qlik Cloud side, not in KPImailer.
Create the OAuth client (M2M)
Section titled “Create the OAuth client (M2M)”- In Qlik Cloud, open the Administration activity center and go to Integrations → OAuth.
- Select Create new. Give it a name that identifies the integration (for example
KPImailer) and set Client type to Web - Qlik Cloud doesn’t have a separate “machine-to-machine” client type; M2M is a mode within the Web type. - Turn on Machine-to-machine. Leave M2M user impersonation off - KPImailer authenticates as its own dedicated identity, not as an impersonated user.
- Under Authentication method, leave Client secret selected so Qlik Cloud generates one for you.
- Choose the scopes to grant - see Minimum privileges for the bot user below before accepting Qlik Cloud’s defaults.
- Select Create. The Client ID and Client secret are both shown once - copy them straight into KPImailer’s Qlik Cloud connection form, since Qlik Cloud won’t display the secret again after this screen closes.
- Open the new client’s ⋮ menu and select Change consent method → Trusted. This step is easy to miss but required - an M2M client left on its default consent method can’t authenticate without a user present, which is exactly how KPImailer uses it.
Create a Web integration
Section titled “Create a Web integration”Separately from the OAuth client, KPImailer also needs a Web integration ID. This isn’t part of authentication - it’s a CORS allowlist that tells Qlik Cloud which origins are allowed to load Qlik content in a browser, which KPImailer needs when rendering Qlik sheets and objects into reports.
- In the same Administration activity center, go to Integrations → Web.
- Select Create new, give it a name, and add the exact origin KPImailer is reachable at -
for example
https://your-kpimailer-server(include the port if it isn’t 443). Qlik Cloud doesn’t support wildcards, so this must match exactly. - Select Add, then Create. Copy the resulting Web integration ID into KPImailer alongside the OAuth client ID and secret.
Minimum privileges for the bot user
Section titled “Minimum privileges for the bot user”The first time the OAuth client requests a token, Qlik Cloud automatically creates a hidden bot user for it - this is the identity KPImailer actually acts as against your tenant.
To reduce it: go to Administration activity center → Manage users → All users, find the bot user (named after the OAuth client you created), open Manage roles, and replace Tenant Admin with:
- Analytics Admin - a built-in role that can read and manage every app across every shared and managed space tenant-wide, which is what KPImailer needs to populate the Qlik Repository and support “All apps” alerts, without also granting user administration or access to other people’s personal spaces.
- A custom role granting the Use webhooks permission, so KPImailer can create the webhook subscription described under Test connection below.
At minimum, select these scopes on the OAuth client itself (step 5 above):
admin.apps:read, admin.spaces:read, apps.report:export, and webhooks -
scopes only narrow what the token can do, they never grant more than the bot user’s role
already allows. If KPImailer reports a permission error for a specific action after tightening
access, that error names the missing piece - add it rather than reverting to Tenant Admin.
-
Open Settings → Qlik servers. Each configured server shows a Configured badge, its display name and URL, and when apps were last synced.
-
Select Edit on a server to change its settings.
On-premise (certificate-authenticated Qlik Sense Enterprise on Windows):
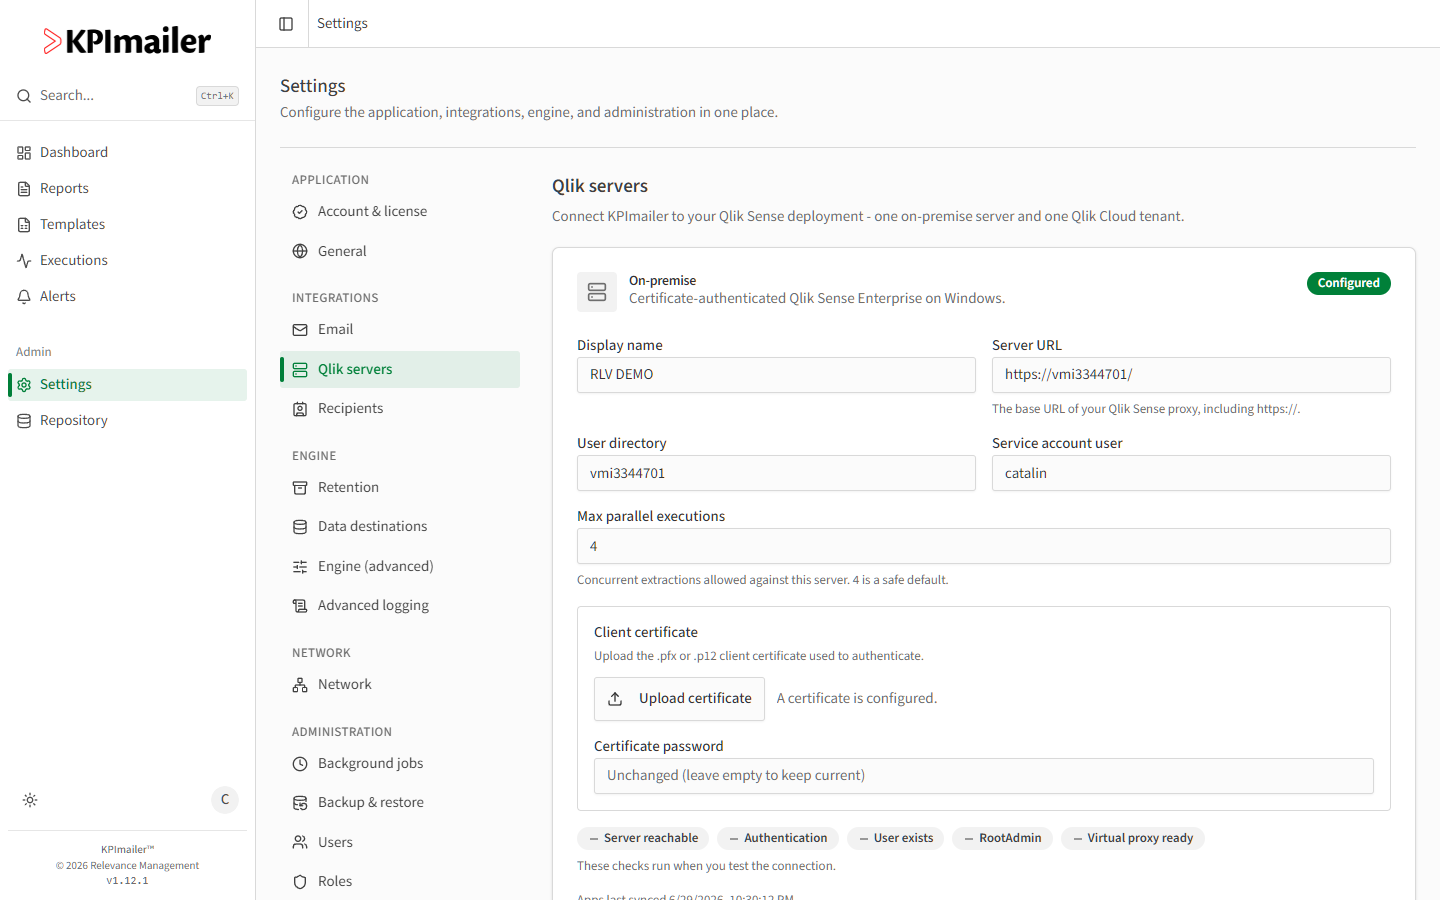
- Display name, Server URL (the Qlik Sense proxy base URL, including
https://), User directory, and Service account user identify the connection. - Max parallel executions caps concurrent extractions against this server - 4 is a safe default.
- Client certificate - upload a
.pfxor.p12client certificate to authenticate. Certificate password is encrypted and not shown again; leave it blank to keep the current one.
Qlik Cloud (OAuth2 machine-to-machine client):
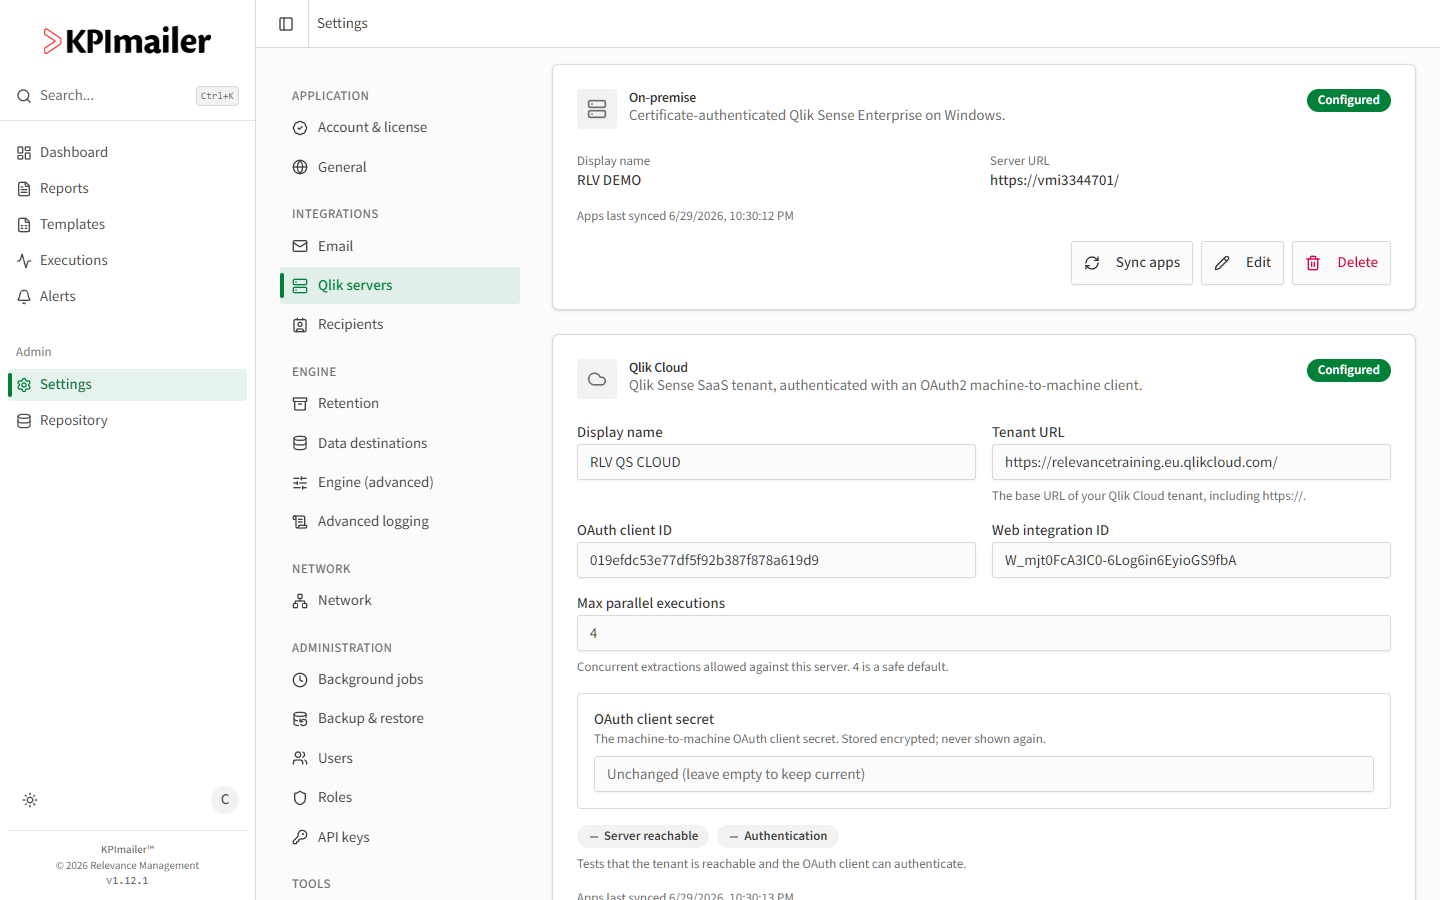
- Display name and Tenant URL (including
https://) identify the tenant. - OAuth client ID, Web integration ID, and OAuth client secret come from the OAuth client and Web integration you create in the Qlik Cloud tenant - see Setting up Qlik Cloud access above for exact steps. OAuth client secret is encrypted and never shown again after saving - leave it blank to keep the current one.
- Display name, Server URL (the Qlik Sense proxy base URL, including
-
Select Test connection before saving. The checks shown differ by server type: on-premise verifies Server reachable, Authentication, User exists, RootAdmin, and Virtual proxy ready - on-premise only, this step also automatically creates (or, on a later test, adjusts) a dedicated virtual proxy named
kpimailerin your Qlik Sense environment, so KPImailer’s own sessions stay isolated from users browsing Qlik Sense directly through the default hub. Qlik Cloud verifies Server reachable and Authentication only, since Qlik Cloud has no virtual proxy concept - instead, the first successful test provisions a webhook subscription in the tenant (using the Use webhooks permission from above) so Qlik Cloud app reload alerts fire the moment a reload finishes, rather than KPImailer polling for it. Re-running Test connection later reuses the existing webhook instead of creating a duplicate. -
Select Save.
-
Use Sync apps any time to pull newly published apps into the Qlik Repository without waiting for the next automatic sync.
When to change this
Section titled “When to change this”- Rotating credentials - replace the client certificate (on-premise) or the OAuth client secret (Qlik Cloud) before the old one expires, and test the connection before relying on it.
- A Qlik admin changes the service account or its permissions - update Service account user / User directory (on-premise) or the OAuth client (Cloud) to match.
- Reports are slow or timing out under load - lower Max parallel executions if the Qlik server itself is struggling to keep up with concurrent extractions; raise it if the server has headroom and reports are queuing unnecessarily.
Worked example
Section titled “Worked example”A certificate used for the on-premise connection is due to expire next week. An administrator
generates a new client certificate on the Qlik Sense server, opens Settings → Qlik
servers → Edit on the on-premise entry, uploads the new .pfx file with Upload
certificate, enters its password, and selects Test connection - all five checks pass, so
they save with confidence before the old certificate expires.
A Qlik Cloud tenant is being connected for the first time. A Qlik Cloud administrator creates the OAuth client and Web integration following Setting up Qlik Cloud access, pastes all three values into Settings → Qlik servers → Edit, and selects Test connection - both checks pass. Before relying on it, they open Manage users in Qlik Cloud, find the new bot user, and swap its default Tenant Admin role for Analytics Admin plus the webhooks custom role, then re-run Test connection to confirm it still authenticates.